Garment & Measurement Configuration
Configure your garment types and measurement fields to match your tailoring business needs. Set up once and use throughout the system for consistent measurement tracking.
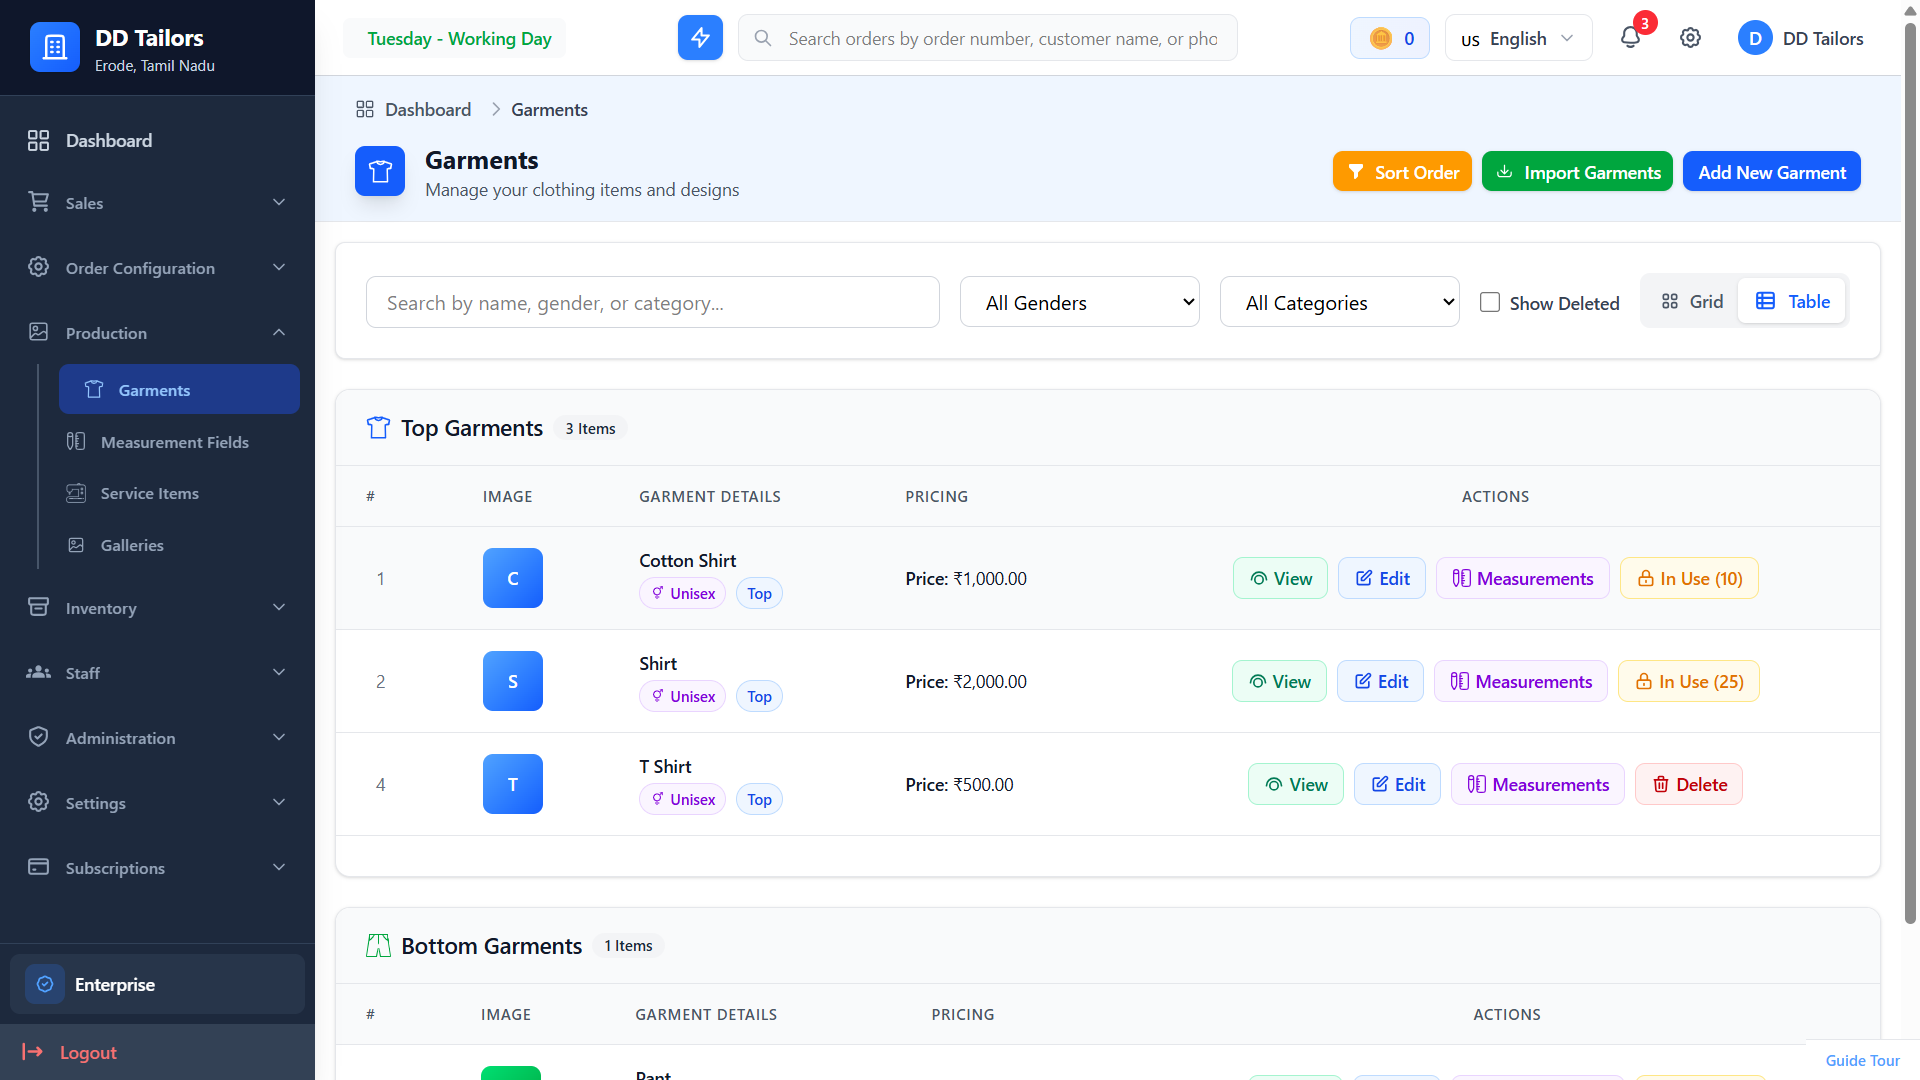
Garment types configuration page
What are Garments?
Garments are the types of clothing items your business creates. Each garment type can have:
- Custom Measurement Fields - Define what measurements are needed (collar, sleeve, length, etc.)
- Reference Images - Visual guides for staff and customers
- Pricing Rules - Base rates and staff-specific rates
- Gender Categories - Male, Female, or Unisex garments
Creating Garment Types
Set up your garment catalog:
- Navigate to Production → Garments - Access garment configuration
- Click "Add New Garment" - Open the creation form
-
Enter Basic Information:
- Garment Name (e.g., "Men's Shirt", "Ladies Blouse", "Suit Jacket")
- Gender Category (Male/Female/Unisex)
- Garment Category (Top/Bottom)
- Price
- Assign Measurement Fields
- Upload Reference Image - Add a photo showing measurement points
- Click "Save Garment" - The garment type is created
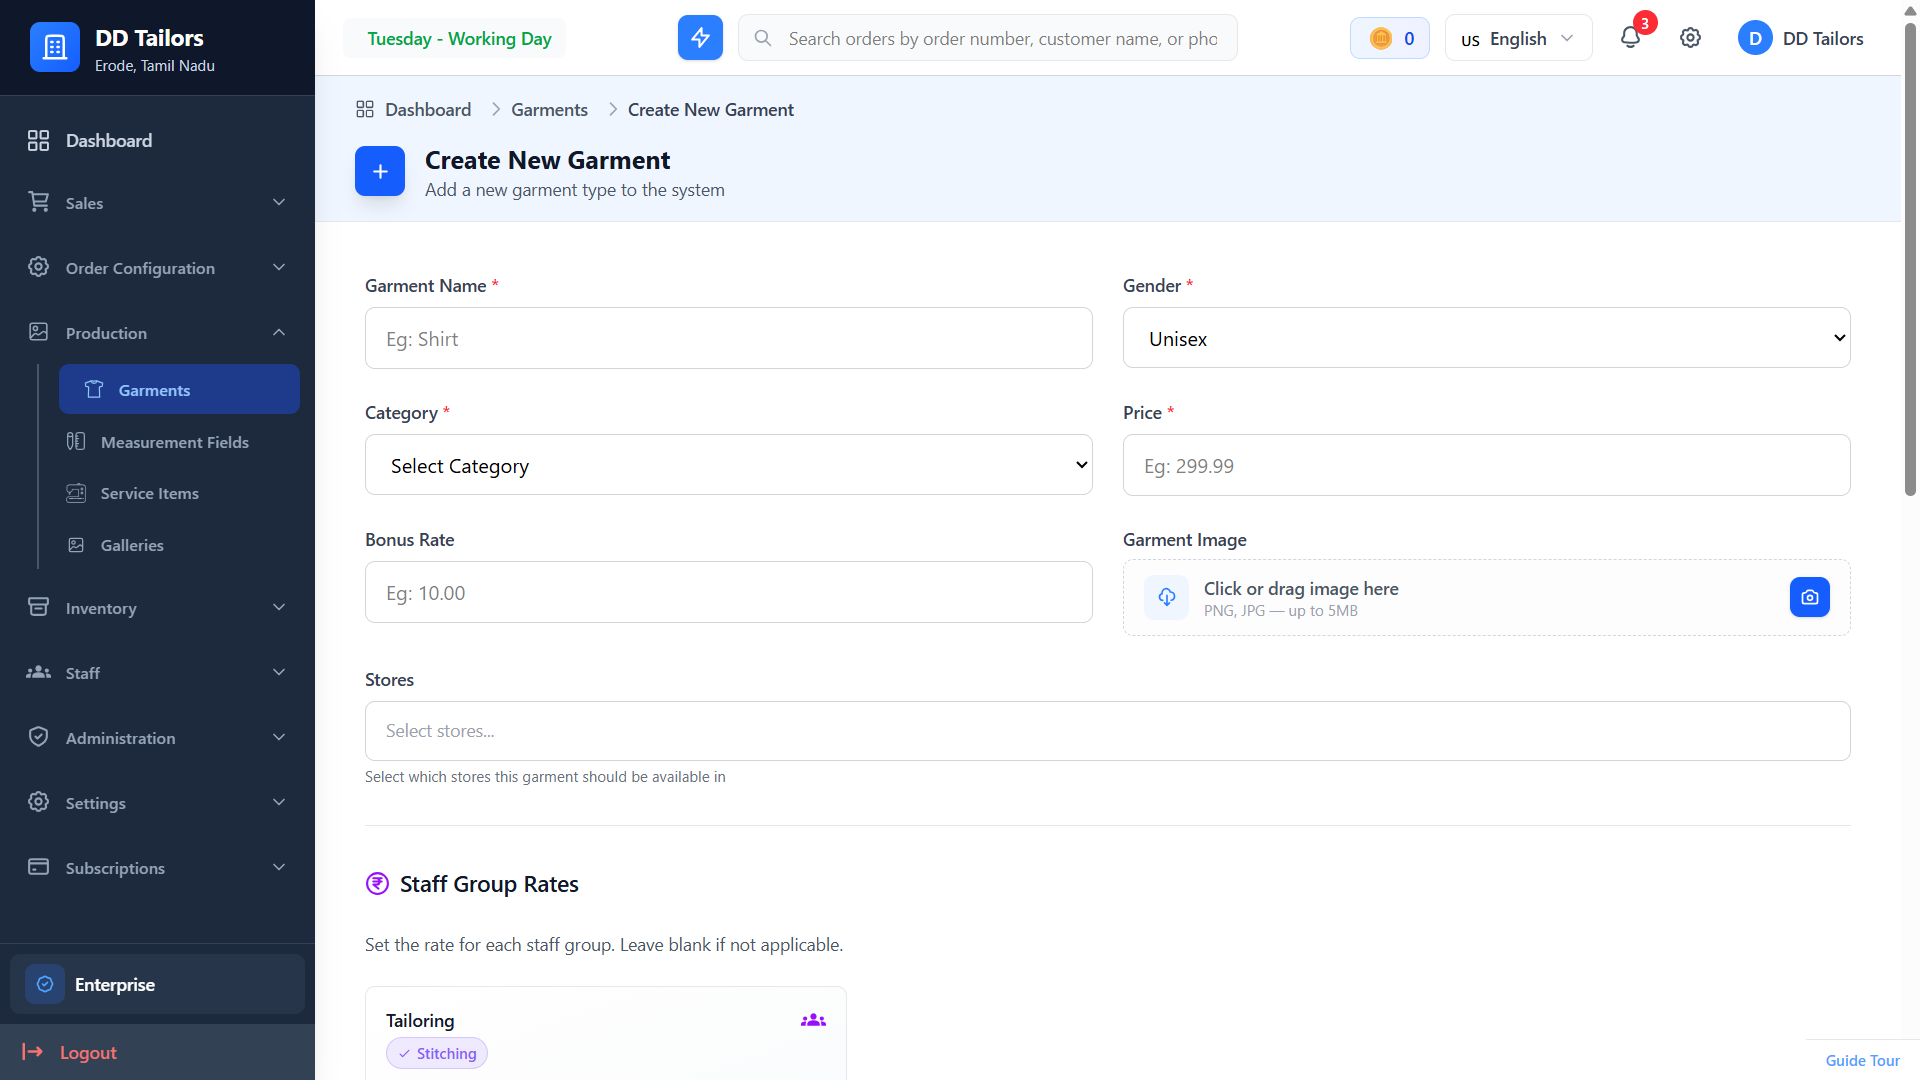
Garment creation form with measurement fields
DD Tailors includes a garment onboarding wizard that helps you set up common garment types quickly. New accounts are automatically guided through this setup.
Measurement Fields
Measurement fields define what specific measurements you need for each garment type. Common examples include:
Shirt Measurements
- Collar
- Shoulder Width
- Chest
- Waist
- Sleeve Length
- Shirt Length
Pant Measurements
- Waist
- Hip
- Thigh
- Knee
- Bottom
- Pant Length
Creating Measurement Fields
- Go to Production → Measurement Fields
- Click "Add New Field"
- Enter field details:
- Field Name - "Collar", "Waist", "Length", etc. (Support for multilingual names)
- Category - Categorize fields for better organization
- Field Type - Number, Text, or Dropdown
- Chargable Option - Determine if the field affects pricing separately
- Save the measurement field
Assigning Fields to Garments
- Open a garment (e.g., "Men's Shirt")
- Click "Measurements" button
- Select the fields needed for this garment
- Set the order fields appear
- Save the configuration
Pricing & Rates
Configure pricing for garments and staff rates:
Base Garment Rates
- Open the garment creation form
- In the price field enter the base price for the garment
- Add bonus rates for special cases (optional)
- Save the garment
Staff Group Rates
Set different rates for different staff skill levels:
- Go to garment's "Staff Rates" section
- Show the list of staff groups (e.g., "Master Tailors", etc.,)
- Set the rate this group charges for this garment
- Repeat for each staff group
- Save the garment
Note: Staff rates are used for earnings calculation when staff complete work on orders.
Multilingual Support
Translate garment names and measurement fields for different languages:
- Open measurement field
- Go to "Translations" dropdown
- Select language to add
- Enter translated name
- Save Measurement
- The system will show appropriate language based on user preferences
Garment Onboarding Wizard
For new tailoring businesses, DD Tailors provides a quick setup wizard:
- While Registering for the software after completing the basic onboarding process, you can use the Garment Onboarding Wizard
- Choose from pre-configured garment templates
- Select which garments you offer
- Review and customize measurement fields
- Click "Complete Setup" - Common garments are automatically created!
Gender Categories
Organize garments by gender for easier browsing:
- Male - Men's specific garments (Men's Shirt, Men's Suit, etc.)
- Female - Women's specific garments (Blouse, Saree, Dress, etc.)
- Unisex - Garments suitable for all (Scarves, Alterations, etc.)
When creating orders, you can filter garments by gender to show only relevant options.
Managing Garments
Editing Garments
You can update garment details anytime:
- Edit name, category, gender
- Add or remove measurement fields
- Update pricing
- Change reference images
- Reorder display sequence
Best Practices
✓ Use Clear, Descriptive Names
Name garments clearly so staff can easily find them (e.g., "Men's Formal Shirt" instead of just "Shirt").
✓ Include All Necessary Measurements
Better to have a few extra optional fields than to miss critical measurements.
✓ Use Reference Images
Visual guides dramatically reduce measurement errors, especially for new staff.
✓ Keep Pricing Updated
Review and update garment pricing regularly to reflect material costs and market rates.
✓ Standardize Measurement Units
Stick to one unit system (inches or centimeters) throughout your business to avoid confusion.
Frequently Asked Questions
Can I change measurement fields after creating orders?
How many measurement fields can I add to a garment?
Can different staff members have different rates for the same garment?
What's Next?
Now that you understand the basics, explore these features: